Instances: Difference between revisions
From trifecta
Jump to navigationJump to search
imported>Neon No edit summary |
imported>Neon |
||
| (45 intermediate revisions by the same user not shown) | |||
| Line 1: | Line 1: | ||
===This section needs revision. I will give basic information for now, but full details will be released later.=== | ===This section needs revision. I will give basic information for now, but full details will be released later.=== | ||
<br> | <br> | ||
Instances use a custom party loot system, where every party member gets a <span style="color:#e74c3c">Quest</span>. As long as they are on the map when the boss from the instance dies, they get credit and | Instances use a custom party loot system, where every party member gets a <span style="color:#e74c3c">Quest</span>. As long as they are on the map when the boss from the instance dies, they get credit and get rewards. | ||
<br> | <br> | ||
Instances do not have a cooldown, and can be played at your leisure. | Instances do not have a cooldown, and can be played at your leisure. | ||
== Level 100+ == | == Level 100+ == | ||
[[Hazy Forest]] | {| class="wikitable" style="text-align:center;" | ||
|- | |||
|[[File:Instance_Logo_-_Ghost_Palace.jpg|link=]]<br>[[Ghost Palace]] || [[File:Dungeon_-_DM.jpg|link=]]<br>[[Heart Hunter War Base]] || [[File:Instance_Logo_-_Hazy_Forest.jpg|link=]]<br>[[Hazy Forest]] || [[File:Instance_Logo_-_Room_of_Consciousness.jpg|link=]]<br>[[Room of Consciousness]] || [[File:Instance_Logo_-_Infinite_Space.jpg|link=]]<br>[[Infinite Space]] | |||
|- | |||
|[[File:Instance_Logo_-_Werner_Laboratory.jpg|link=]]<br>[[Werner Laboratory]] | |||
|} | |||
== Level 125+ == | |||
{|class="wikitable" | |||
|- | |||
{| class="wikitable" style="text-align:center;" | |||
|- | |||
|[[File:Instance_Logo_-_Airship.jpg|link=]]<br>[[Airship Assault]] || [[File:Instance_Logo_-_Charleston_Crisis.jpg|link=]]<br>[[Charleston Crisis]] || [[File:Instance_Logo_-_Devil_Tower.jpg|link=]]<br>[[Devil Tower]] || [[File:Instance_Logo_-_Faceworm's_Nest.jpg|link=]]<br>[[Faceworm's Nest]] || [[File:Instance_Logo_-_Hidden_Garden.jpg|link=]]<br>[[Hidden Garden]] | |||
|- | |||
|[[File:Instance_Logo_-_Horror_Toy_Factory.jpg|link=]]<br>[[Horror Toy Factory]] || [[File:Instance_Logo_-_Nightmarish_Jitterbug.jpg|link=]]<br>[[Nightmarish Jitterbug]] || [[File:Instance_Logo_-_OHG.jpg|link=]]<br>[[Old Glass Heim - Normal Mode]] || [[File:Instance_Logo_-_Twilight_Garden.jpg|link=]]<br>[[Twilight Garden]] | |||
|} | |||
== Level 150+ == | |||
{| class="wikitable" style="text-align:center;" | |||
|- | |||
|[[File:Instance_Logo_-_Bios_Island.jpg|link=]]<br>[[Bios Island]] || [[File:Instance_Logo_-_Geffen_Tournament.jpg|link=]]<br>[[Geffen Magic Tournament]] || [[File:Instance_Logo_-_Morse's_Cave.jpg|link=]]<br>[[Morse's Cave]] || [[File:Instance_Logo_-_Sky_Fortress.jpg|link=]]<br>[[Sky Fortress]] || [[File:Instance_Logo_-_Temple_of_the_Demon_God.jpg|link=]]<br>[[Temple of the Demon God]] | |||
|} | |||
== Level 175+ == | == Level 175+ == | ||
[[ | {| class="wikitable" style="text-align:center;" | ||
|- | |||
|[[File:Instance_Logo_-_EDDA_Biolabs.jpg|link=]]<br>[[EDDA Biolab]] || [[File:Instance_Logo_-_Hidden_Garden_-_Hard_Mode.jpg|link=]]<br>[[Hidden Garden - Hard Mode]] || [[File:Instance_Logo_-_Water_Garden.jpg|link=]]<br>[[Water Garden]] || [[File:Instance_Logo_-_Water_Garden_-_Hard_Mode.jpg|link=]]<br>[[Water Garden - Hard Mode]] | |||
|} | |||
== Level 200+ == | == Level 200+ == | ||
[[Old Glass Heim - Hard Mode]] | {| class="wikitable" style="text-align:center;" | ||
[[ | |[[File:Instance_Logo_-_OHG_Hard.jpg|link=]]<br> [[Old Glass Heim - Hard Mode]] || [[File:Instance_Logo_-_OHG_Challence.jpg|link=]]<br> [[Old Glass Heim - Challence Mode]] || [[File:Instance_Logo_-_Schmidt_Hard.jpg|link=]]<br>[[Fall of Glass Heim - Hard Mode]] || [[File:Instance_Logo_-_Villa_of_Deception_1.jpg|link=]]<br>[[Villa of Deception]] || [[File:Instance_Logo_-_Villa_of_Deception.jpg|link=]]<br>[[Villa of Deception - Hard Mode]] | ||
|} | |||
[[Fall of Glass Heim - Hard Mode]] | |||
[[ | |||
Latest revision as of 15:46, 18 January 2026
This section needs revision. I will give basic information for now, but full details will be released later.
Instances use a custom party loot system, where every party member gets a Quest. As long as they are on the map when the boss from the instance dies, they get credit and get rewards.
Instances do not have a cooldown, and can be played at your leisure.
Level 100+
 Ghost Palace |
 Heart Hunter War Base |
 Hazy Forest |
 Room of Consciousness |
 Infinite Space |
 Werner Laboratory |
Level 125+
 Airship Assault |
 Charleston Crisis |
 Devil Tower |
 Faceworm's Nest |
 Hidden Garden |
 Horror Toy Factory |
 Nightmarish Jitterbug |
 Old Glass Heim - Normal Mode |
 Twilight Garden |
Level 150+
 Bios Island |
 Geffen Magic Tournament |
 Morse's Cave |
 Sky Fortress |
 Temple of the Demon God |
Level 175+
 EDDA Biolab |
 Hidden Garden - Hard Mode |
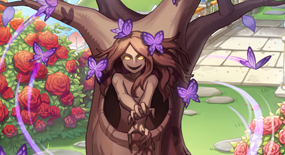 Water Garden |
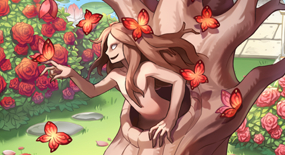 Water Garden - Hard Mode |
Level 200+
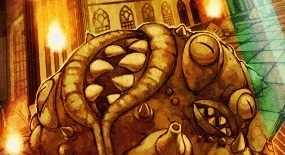 Old Glass Heim - Hard Mode |
 Old Glass Heim - Challence Mode |
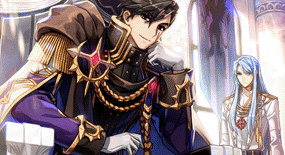 Fall of Glass Heim - Hard Mode |
 Villa of Deception |
 Villa of Deception - Hard Mode |
